Methods of applying data augmentation (Module API)
Data Augmentation is a regularization technique that’s used to avoid overfitting when training Machine Learning models. Although the technique can be applied in a variety of domains, it’s very common in Computer Vision. Adjustments are made to the original images in the training dataset before being used in training. Some example adjustments include translating, cropping, scaling, rotating, changing brightness and contrast. We do this to reduce the dependence of the model on spurious characteristics; e.g. training data may only contain faces that fill 1/4 of the image, so the model trained without data augmentation might unhelpfully learn that faces can only be of this size.
In this tutorial we discuss the different interfaces available in MXNet to perform data augmentation if you’re using the Module API. We start by showing a complete example using Module’s ImageIter, and then unpack the example to gain a greater understanding of the internals. In the process you’ll learn about augmentation functions, mxnet.image.Augmenter classes and Augmenter lists.
%matplotlib inline
import mxnet as mx # used version '1.0.0' at time of writing
import numpy as np
from matplotlib.pyplot import imshow
import multiprocessing
import os

mx.random.seed(42) # set seed for repeatability
We define a utility function below, that will be used for visualising the augmentations in the tutorial.
def plot_mx_array(array):
    """
    Array expected to be height x width x 3 (channels), and values are floats between 0 and 255.
    """
    assert array.shape[2] == 3, "RGB Channel should be last"
    imshow((array.clip(0, 255)/255).asnumpy())
image_dir = os.path.join("data", "images")
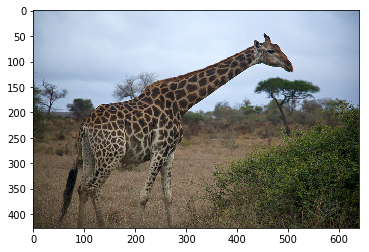
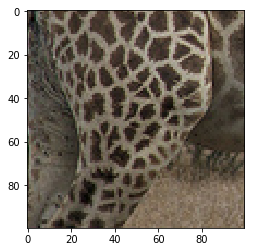
mx.test_utils.download('https://raw.githubusercontent.com/dmlc/web-data/master/mxnet/doc/tutorials/data_aug/inputs/0.jpg', dirname=image_dir)
example_image = mx.image.imread(os.path.join(image_dir,"0.jpg")).astype("float32")
plot_mx_array(example_image)
Quick start using ImageIter
One of the most convenient ways to augment your image data is via arguments of mxnet.image.ImageIter, but you’ll need to reference the documentation of mxnet.image.CreateAugmenter to see a full list of available options. Under the hood, additional arguments passed to ImageIter are collected as keyword arguments (**kwargs), and are passed to mxnet.image.CreateAugmenter. We’ll see this in more detail in the sections below, but mxnet.image.CreateAugmenter creates a list of mxnet.image.Augmenters corresponding to each type of augmentation (e.g. crop, flip, change of brightness, etc.), and this list will be iterated though and the augmentations applied in turn. Alternatively, you can create this list yourself and pass it to ImageIter via the aug_list argument.
We show a simple example of this below, after creating an images.lst file used by the ImageIter. Use tools/im2rec.py to create the images.lst if you don’t already have this for your data.
path_to_image = os.path.join("images", "0.jpg")
index = 0
label = 0.
list_file_content = "{0}\t{1:.5f}\t{2}".format(index, label, path_to_image)

path_list_file = os.path.join(image_dir, "images.lst")
with open(path_list_file, 'w') as f:
    f.write(list_file_content)
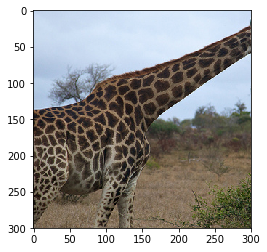
training_iter = mx.image.ImageIter(batch_size = 1,
                                   data_shape = (3, 300, 300),
                                   path_root= 'data', path_imglist=path_list_file,
                                   rand_crop=0.5, rand_mirror=True, inter_method=10,
                                   brightness=0.125, contrast=0.125, saturation=0.125,
                                   pca_noise=0.02
                                   )
for batch in training_iter:
    assert batch.data[0].shape == (1, 3, 300, 300)
    assert batch.label[0].shape == (1,)
    sample = batch.data[0][0].transpose(axes=[1,2,0])
    plot_mx_array(sample)
    break
mxnet.image.ImageDetIter works similarly (with mxnet.image.CreateDetAugmenter), but mxnet.io.ImageRecordIter has a slightly different interface, so reference the documentation here if you’re using Record IO data format.
Manual Augmentation
Although the vast majority of cases will be covered using the augmentation arguments of mxnet.image.ImageIter as we’ve seen above, sometime you’ll want more fine grained control of augmentations. We will now dive into some of the lower level methods for image augmentation, that you can use to manually apply augmentations to images.
Augmentation Functions
MXNet provides a small number of augmentation functions that are quick and easy to use, but they are limited to positional augmentations (such as mxnet.image.random_crop and mxnet.image.resize_short functions) as opposed to color augmentations (such as brightness jitter). Although these functions are easy to apply, the mxnet.image.Augmenter classes are much more comprehensive and just as easy to use, as we’ll see in the next section.
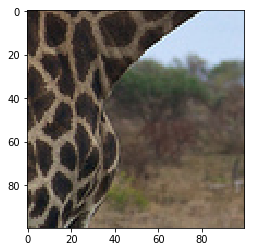
aug_image, crop_box = mx.image.random_crop(example_image, size=(100, 100))
plot_mx_array(aug_image)
assert aug_image.shape == (100, 100, 3)
Augmenter Classes
You can apply a wide variety of positional and color augmentations with mxnet.image.Augmenter classes, and using them is the recommended approach for applying augmentations manually. After creating an instance of an Augmenter with the required parameters, you can call the Augmenter just as you would a function. Under the hood a __call__ method is defined which applies the augmentation. Augmenters with randomness are randomized each time the Augmenter is called, so calling the same Augmenter twice will give different results on the same input.
aug = mx.image.RandomCropAug(size=(100, 100))
aug_image = aug(example_image)
plot_mx_array(aug_image)
assert aug_image.shape == (100, 100, 3)
Augmenter list
Very often you’ll want to apply many different types of augmentation to an image. Instead of nesting the calls of Augmenters, a natural structure for handling a large number of Augmenters is a list. You can construct this list manually, or you can use helper functions like mxnet.image.CreateAugmenter to create these lists automatically.
Object detection tasks require the same positional augmentations to be applied to the data and the label, so you should use mxnet.image.CreateDetAugmenter which handles this case.
# created manually
aug_list = [mx.image.RandomCropAug(size=(100, 100)), mx.image.BrightnessJitterAug(brightness=1)]
aug_image = example_image.copy()
for aug in aug_list:
    aug_image = aug(aug_image)
plot_mx_array(aug_image)
assert all([isinstance(a, mx.image.Augmenter) for a in aug_list])
# created automatically
aug_list = mx.image.CreateAugmenter(data_shape=(3, 300, 300), rand_crop=0.5,
        rand_mirror=True, mean=True, brightness=0.125, contrast=0.125,
        saturation=0.125, pca_noise=0.05, inter_method=10)
aug_image = example_image.copy()
for aug in aug_list:
    aug_image = aug(aug_image)
plot_mx_array(aug_image)
assert all([isinstance(a, mx.image.Augmenter) for a in aug_list])
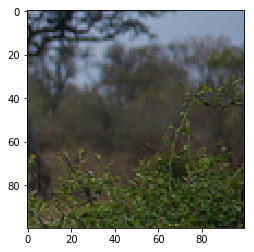
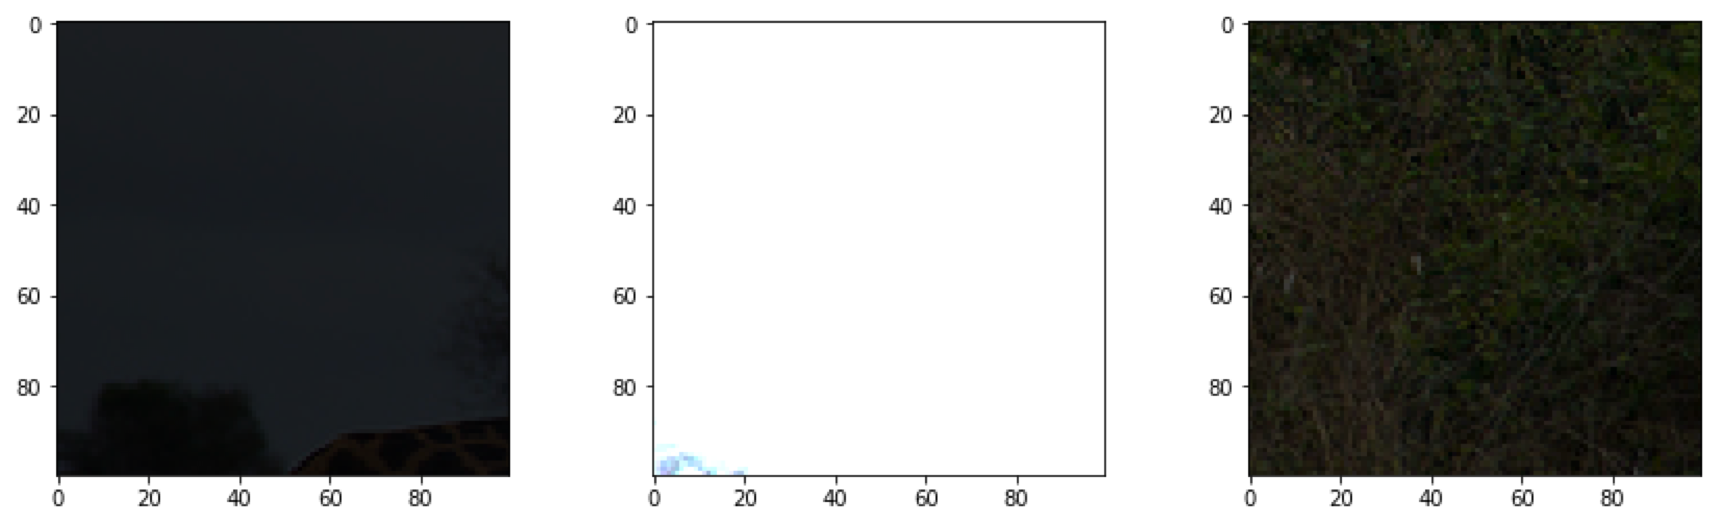
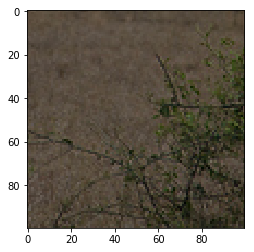
Watch Out! Check some examples that are output after applying all the augmentations. You may find that the augmentation steps are too severe and may actually prevent the model from learning. Some of the augmentation parameters used in this tutorial are set high for demonstration purposes (e.g. brightness=1); you might want to reduce them if your training error stays too high during training. Some examples of excessive augmentation are shown below: